This is the starting point for creating new events (1) and place where you will be able to see the list of all of your created events (2). If you have large number of events, you may also use the Search Events option. After you create new event, it will appear on the bottom of the events table, along with the other events you have already created. Here you will find the overview of all the information about your events: Event Name, Event Location, Event Date and Time and Event Shortcode. Using this table you may edit and/or delete events and perform bulk actions. In case your event expired or you want to disable the event from your page/post just flick the switch in the “Active” column.
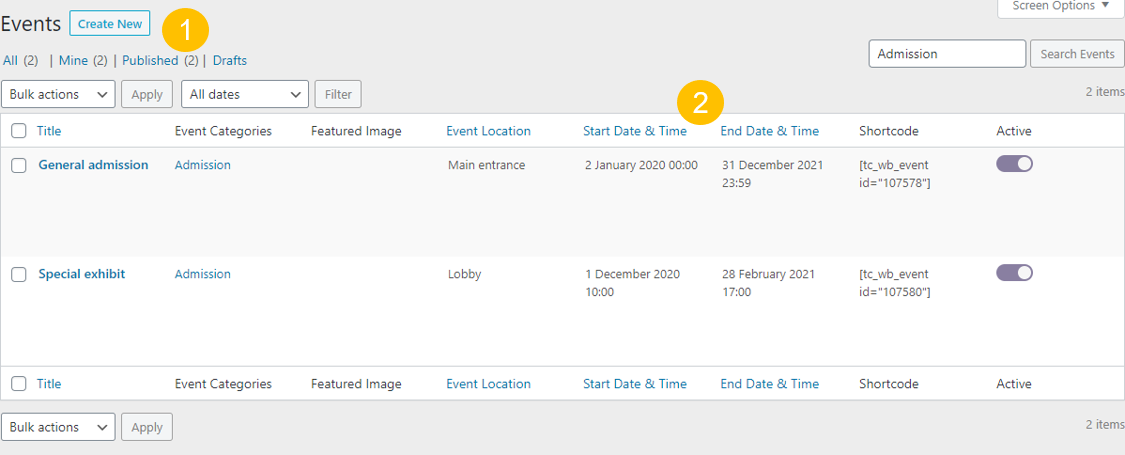 However, if you are just starting with Tixmeister, it is perfectly normal to have a blank table here.
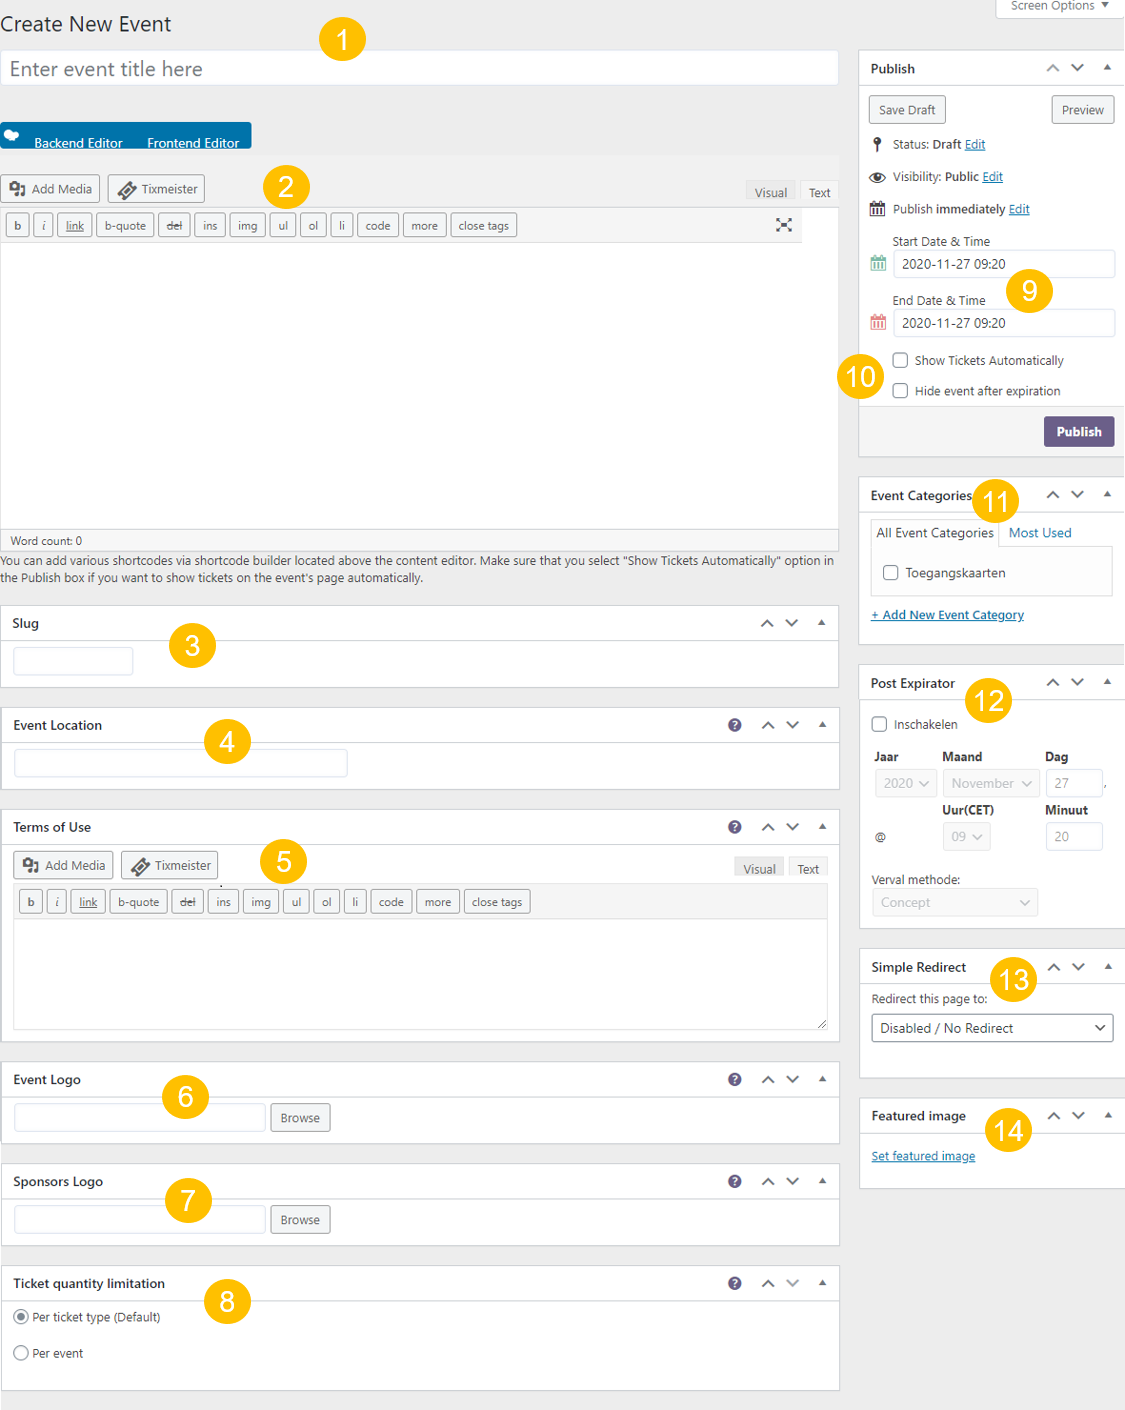
Now, when you hit that Create New button (like indicated on the picture above), you will be presented with new page for entering the parameters for the event you want to create. Many of those options are completely optional and may be left blank, however, all of those have some purpose and logic to it.
Let‘s dive in the details of all the available options and see what they can be used for:
1. First and foremost, you should enter the name of your event which is, obviously, a mandatory field.
2. Next up is an event description. This field is optional but may come handy when, for example, you want to list your event agenda, present the speakers on your seminar, or anything else (you got the idea). Here you can use standard WordPress formatting and Tixmeister shortcodes as well.
3. Slug is straigthforward WordPress behaviour. You can ignore it if you want.
4. Event Location is an optional field but is intended to be used for entering information about your event‘s location.
5. Terms of Use is another optional field and is intended to be used for entering the terms of use of the tickets purchased on your website (i.e. “All purchases are final”, etc.)
6. Event Logo is the place where you should enter URL of your event‘s logo or browse to the logo location using standard WordPress media browser. Note: if your logo fails to display in the ticket templates or place where the event logo shortcode is used, try entering relative rather than absolute URL.
7. Sponsor‘s Logo is intended to be used for logo of your sponsor and has completely the same behavior as Event Logo
8. Ticket quantity limitation is typically left at the default. The per event option was added for some edge-cases
9. Event start and ending date and time… pretty self explanatory. For events with timeslots (more about those later) you should enter the first and last dates for which there should be timeslots.
10. Show Tickets Automatically checkbox may come pretty handy to display all the tickets associated to this event on the same event page without the need to place shortcodes for event tickets. Hide event after expiration is an option to hide the event from the archive pages once it gets past the event end date & time.
11. Event Categories – if you are having large number of events, it is always helpful to sort them in certain categories (Concerts, Seminars, Parties, etc.) From here you can add new event category but for more complete editing of event categories, you should visit Event Categories settings
12. See help for the WordPress plug-in Post Expirator
13. See help for the WordPress plug-in Simple Redirect
14. Featured Image can be used as with any other WordPress page or post
Oh, and last but not least – a Publish button which will publish your event once you finish entering all of the information regarding your event.
So, after reading this, you may come to conclusion that most of the fields and options when creating or editing event page is completely optional with the exception of event name and starting and ending date. However, all of the elements of the event page have their corresponding ticket template element which can be used to display any and all the information you have entered here on the ticket for your event.
Once you have finished creating your event and pressed that nice purple “Publish” button, you will notice a witty message on top which will propose to create some tickets types for your event rigt away or you can do so by visiting Tickets section of Tixmeister menu. Also, once you have published your event, an API key for that event will be automatically created which you will be then able to use with our Check-in apps.