If you are familiar with WooCommerce or some other webshop program, you will also be familiar with Products in the context of a webshop. Since Tixmeister leverages the power of WooCommerce to get you beautiful ticketing, it will not come as a surprise that a Ticket in Tixmeister is a WooCommerce Product under the hood… with some extras, of course.
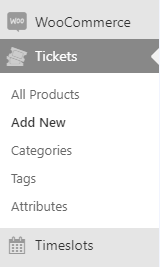 When you hit the Add New button in the Tickets menu you‘ll see the Add New Product page with all the options WooCommerce is offering. It may seem complicated but if you follow this easy guide, you‘ll end up with tickets ready to sell in no time. Remember: a Ticket = a Product and don‘t be surprised if we switch between terms.
WooCommerce uses various types of Products but only to are relevant for the purpose of ticketing: Simple products and Variable product. The latter is used if you intend to sell tickets with multiple prices (aduls, youth, other discounts). So most of the time, really.
Variable products offer a wealth of customizing options but may be a bit overwhelming so we‘ll start with explaining Simple tickets.
CREATING A SIMPLE TICKET
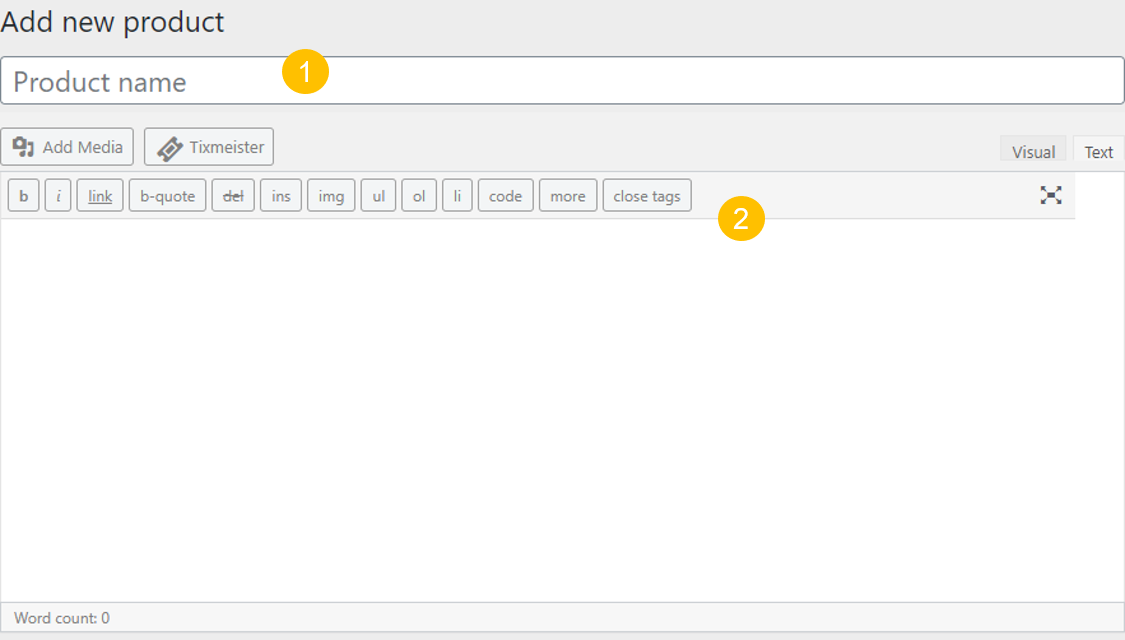
First off, there is a Product Name field which is where you are going to enter what you would like your Ticket to be called (1). Right below the name, there is quite large field which is actually the product (in our case it is a ticket) description but it is entirely optional and you may leave it empty or give it short or long description (2).
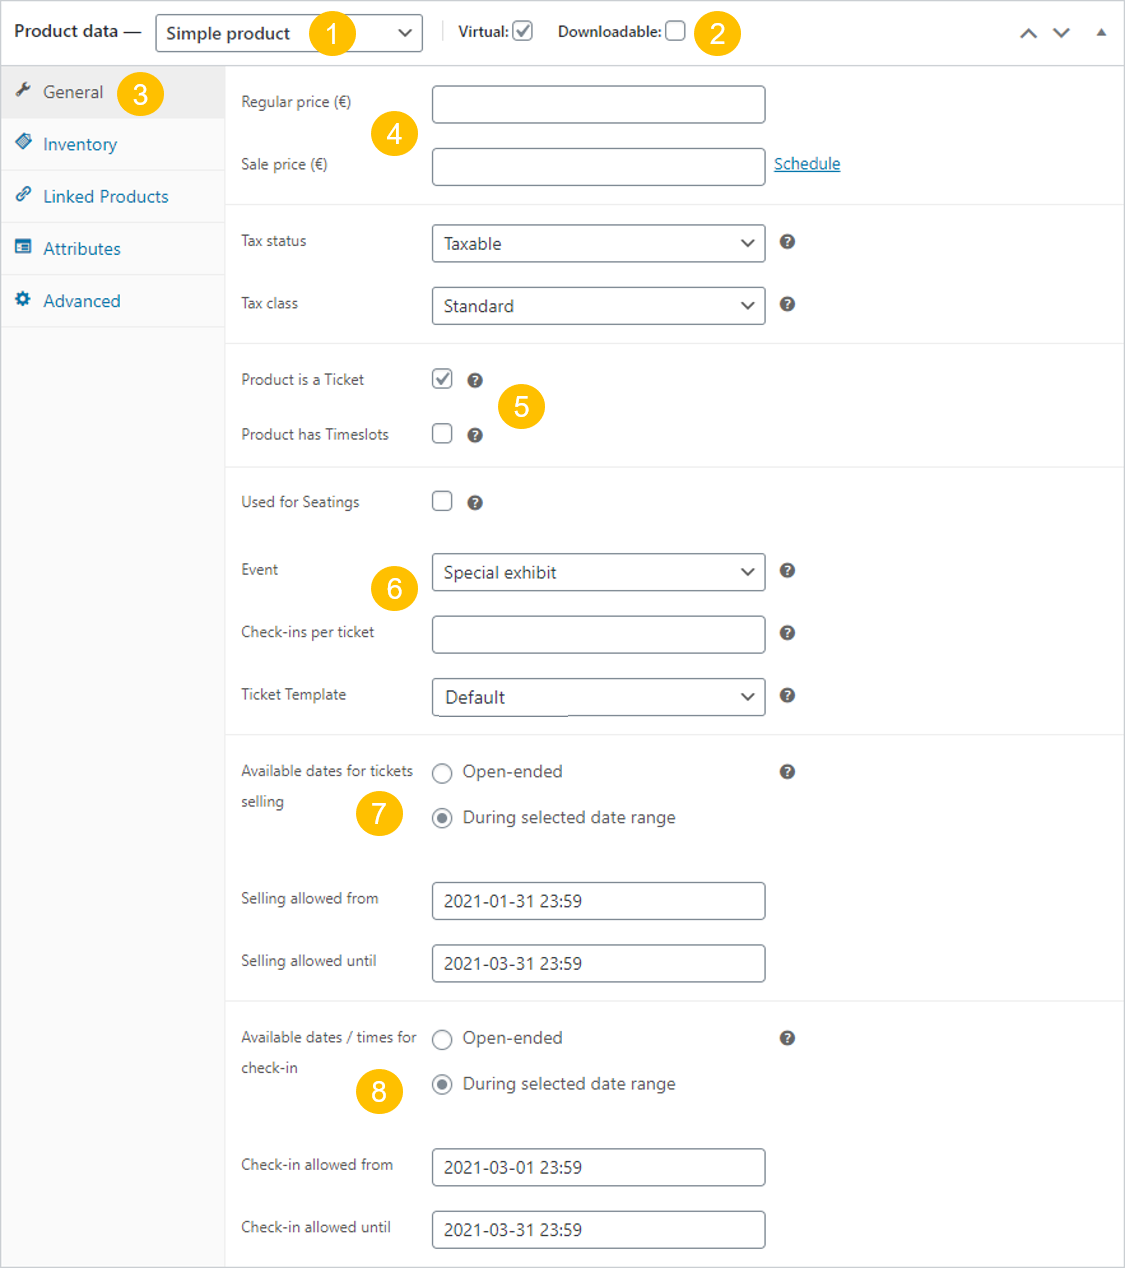
Below the description field is where things get interesting. First, you will notice the dropdown menu called Product Data (1). By default it states Simple product and we‘ll leave like that for now. Next to that dropdown are Virtual and Downloadable checkboxes (2). Virtual products don‘t get shipped which is often the case with Tickets, so you may want to check Virtual. Downloadable should typically be left unchecked. Right below is the menu with lots of options but for now, we‘ll use just the General (3) which is already selected by default. Within the General you‘ll find a few fields. Below that are the price fields (4). The Regular Price field is where you are going to put the price for your ticket. Right below that is the Sale Price. You may leave that empty but it is nice to have if you plan, for example, Early Bird discounts or a Last Minute sale. You may even schedule when you want to schedule the discount price using the Schedule right beside that field.
Now, below is two tiny checkboxes which are actually quite important in the whole process. They read Product is a Ticket and Product has Timeslots (5). Since we are creating tickets, it is mandatory to check that checkbox! Otherwise, you‘ll end up with a plain-vanilla WooCommerce product which is fine for selling iPads but not for tickets. Checked it – OK. But wait… now there are some more options now. What‘s going on here? Well, you‘ll recall that a Ticket is Product with special capabilities and therefore it must have some additional, specific options. Leave the checbox for Timeslots unchecked for now. We‘ll cover that later because a Timeslot-Tickets cannot be a Simple product.
First specific ticket-field is a checkbox to indicate that there is a seating plan for this Ticket. This functionality is planned for a future release of Tixmeister and the checkbox can be ignored for now. Below that is a dropdown menu where you are able to choose for which Event you are creating ticket type (6). and you can specify how many check-ins are allowed for each ticket and which Ticket-Template should be used. Check-ins per ticket is useful when you are hosting multiple day and/or multiple entrance/exit event. By default it states Unlimited but you may define the exact number of check-ins. Below that field is the Ticket Template dropdown menu. If you have created a nifty Ticket Template for your ticket type, you may select it here. Otherwise, you may leave it Default.
In the sections with Available dates for tickets selling (7) and Available dates/times for check-in (8) you can specify when tickets are on sale and when check-ins are possible.
 On the right side, there are some more options like Product Categories,
 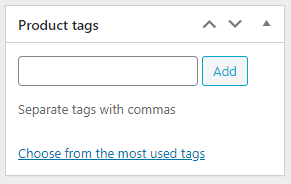 Product Tags, Product Image and Product Gallery. That ought to be self-explanatory but keep in mind that each time you see a “product” in title, it actually means “ticket” for this purpose.
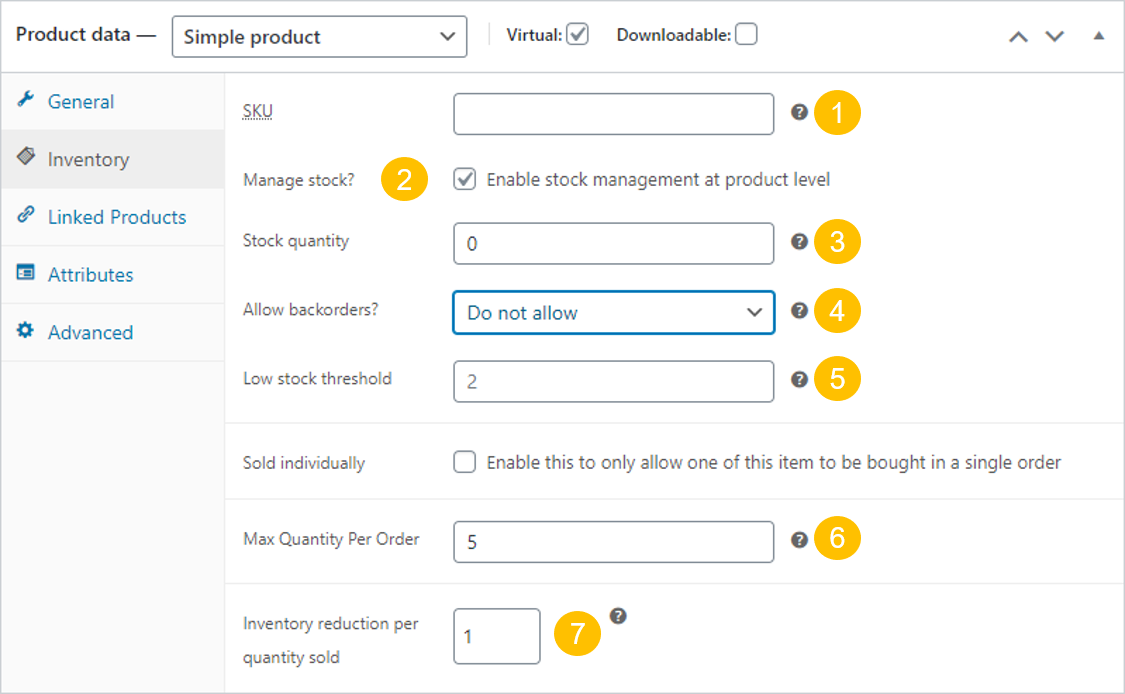
Now let‘s move to the Inventory tab. Tickets are not stocked in a warehouse so why Inventory? Think of it as capacity and everything makes sense.
The Inventory tab shows a range of fields. First is the SKU field (1). SKU stands for Stock Keeping Unit and it is basically a certain code or identifier if you will, for the product. You may leave it empty but it may be useful you plan selling lots of different tickets. Next is an important field: Manage stock? (2). This checkbox should be checked if you want to ensure that you are not selling more tickets than can be accomodated. Whenever a ticket is sold, the Stock quantity (3) is reduced and Tixmeister makes sure the ticket can‘t be purchased if there is no stock (= capacity) left. That is, if you don‘t allow backorders (4). You should set Stock quantity to maximum capacity when you create a ticket. The Low stock threshold (5) triggers an email to the site-manager if inventory hits it. You can set the Max Quantity per Order (6) if you want to limit the number of tickets can be purchased in one go. This is particularly helpful when you offer free reservations on your ticket-site. It does not become impossible for a visitor to scoop a large number of reservervations but it does provide a hurdle. The field Inventory reduction per quantity sold (7) is one of the few exceptions where Product does not equal Ticket. A Product can consist of multiple Tickets. An example would be a family-ticket. Buy one and capacity reduces by, say, four.
 When you are done setting up all of the above, you may hit the Publish button on the upper right corner and that‘s it. You have just created your first simple Ticket Type. For most of you, this is going to be just enough most of the time. But WooCommerce certainly doesn‘t stop there and there are a lots more you can do with it. So if you want to add some perks or sell something else WITH the tickets, just continue reading.
TICKET AS VARIABLE PRODUCT
Remember that Product Data dropdown menu which we left with the default value of Simple Product? This time we‘ll select Variable Product (1). You can ignore the other options in the dropdown.

When you choose Variable product from dropdown menu, you may wonder what happened to the price. That‘s ok. We‘ve all been through that. For Variable product/ticket is is assumed that each variation will have its own price. For now, check your Product is a Ticket checkbox and enter information regarding ticket like you would do if the ticket was a Simple product.
Variable products are highly customizable. The flipside is that they are somewhat tricky to setup. So don‘t worry if you are confused at first. You‘ll get the hang of it soon enough.
Now, select Attributes from the product menu and you‘ll be to the Attributes tab. There is a single dropdown menu with just one item enabled called Custom product attribute (1). Right next to that dropdown is the Add button (2). Don‘t just click Add rightaway. Tixmeister comes with two pre-defined Attributes: Tickettypes and Times. Without them, things wouldn‘t work. Times will be covered later when we get to Timeslots. But Tickettypes are explained right here.
Go ahead, select Tickettype and click Add. The Attributes tab will be populated with a Tickettype section that includes an input field for Value(s) (1) and two checkboxes (2). Unlike on the image below, the Value(s) field will be empty. For Tickettypes both checkboxes need to be checked. Tixmeister comes complete with three pre-defined Tickettypes out-of-the-box and they are selected in the example in the image. You can create Tickettypes as much as you want using the Add New button. Say, you also want a Tickettype for “Members”, simply click Add New, enter Members and you‘re all set. Attributes can be created and selected in the Product data screen. Editing (maybe Youth should become Child) is only possible via menu Tickets/Attributes.
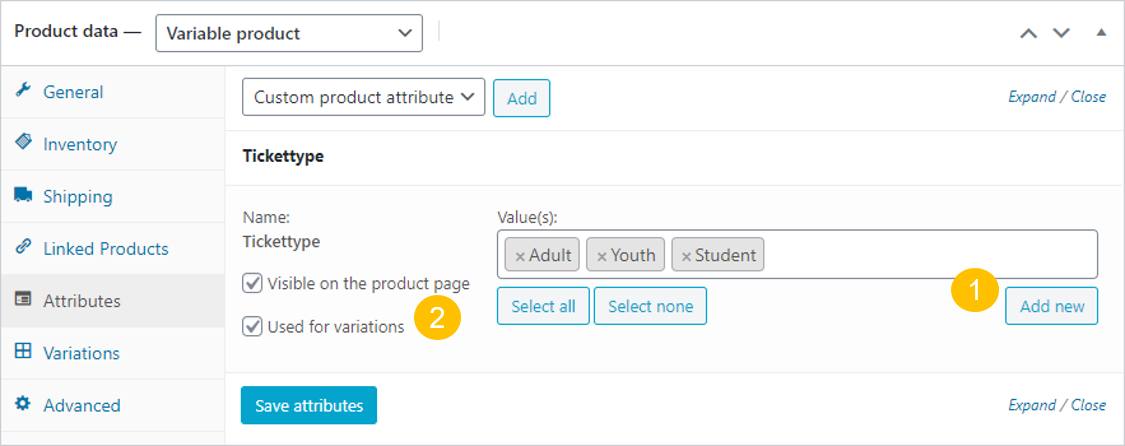
It is perfectly okay to create more Attributes but in most Tixmeister applications it won‘t be necessary. You will, however, want to add Values to the Tickettypes and Times Attributes. When done, check the “Visible on the product page” and “Used for variations” checkboxes and hit Save Attributes button.
Hey, congrats! You‘re well underway, probably half way done.
Now, head down to Variation menu item, right below the Attributes. When you click and open Variations you‘ll find yourself with a blank page again. Well, yes. But not for long. You‘ll notice the Add variation dropdown menu on top. Click there and select the other item, called “Create variations from all attributes” and then click Go. Your browser will then pop up something that seems like warning. But it is actually a confirmation that you really want to create variations from attributes. Click Yes and in the next browser pop up click OK. Voila, you have successfully loaded your variations.
If you wonder why you first need to set up Attributes and then create Variations from those attributes, here‘s why: Attributes can be re-used on other tickets. For instance, some other ticket could use Adult and Youth as Tickettypes. Although having to deal with both Attributes and Variations seems inefficient at first, it is in fact a time-saver down the road.

Now off to setting up the Variations.
When the variations are loaded, you should come up with something like shown on the picture below: basically, it is a list of your variations. But you will notice that if you hover the right side of each of the variations row, a three icons menu will appear: Three dashes icon (used for creating the order by dragging and dropping), The Arrow icon (used to expand the options for each variation so that they become visible) and Remove (used to, guess what, remove the variation). The most important option for now is certainly the Expand one (1), and although you could expand each variation one at a time, you could expand them all by using tiny little Expand title on the top or bottom right (2).

When variations are expanded, you‘ll see many options that are familiar from Simple Products. Let‘s go through the differences. For Variations, Manage stock? (1) can be set both in the Inventory tab and in the Variations tab. The field in the Inventory tab trumps the Variations tab. Most of the time, you will want to check it in the Inventory tab. In that case, all sales reduce the same capacity. But sometimes, you will want to keep track of capacity at the level of individual variations, for instance when you have two types of seats. In such case, uncheck the Manage stock? field in the Inventory tab and check it here.
Next to the Regular price field (2) is a link with the word Schedule. Click it and you‘ll be shown to date input fields. This is useful for variation that only apply during a certain period. An example would be a discount-ticket during the school holidays. This is mostly applicable to Timeslots. That leaves us with the field Inventory reduction per quantity sold (3) which is meaningful only in the contect of Variations. Say you sell family tickets: the stock reduction for a family ticket variation may be four whereas it is one for all other variations. All other fields serve the same purpose as for Simple Products.

It is important to note that only the Regular Price field is mandatory, All other fields are optional.
When you are done setting all of your variations, just hit Save Changes and that‘s it! Ready to go! From now on, when customers choose to buy a ticket which has a variations, they will be able to choose a ticket variation from the dropdown menu and the price and all of the other parameters set will change accordingly.